")
This DIY reupholster chair tutorial encompasses a This Finish Up chair. You’ll be able to comply with the identical primary steps to recuperate and renew related chairs.

Â
As a mum or dad of two elementary faculty college students, I all the time ask my youngsters’ academics in the event that they want something for his or her room. Often the reply is markers, wipes, or snacks.
However, my kindergartner’s trainer is aware of about my secret identification after having taught my older son for a yr.
So, she didn’t hesitate to ask me if I may probably recuperate a number of actually unhappy wanting chairs that had seen their fair proportion of kindergarten butts. 😉
(I’ve included affiliate hyperlinks on your comfort. I earn a small share from a purchase order utilizing these hyperlinks. There isn’t any extra value to you. You’ll be able to learn extra about affiliate hyperlinks right here.)
Â

The right way to Reupholster This Finish Up Chairs (a Easy DIY)
These poor chairs have been nonetheless very examine and in fine condition, however the material was nubby, pilled, stained, and never in good situation.
I really like a very good problem, particularly with a strong piece of furnishings, so I took all three of the chairs dwelling over the Christmas break for my subsequent DIY challenge.
I knew I may give these chairs new life. Step one concerned eradicating the seats and the outdated upholstery material.
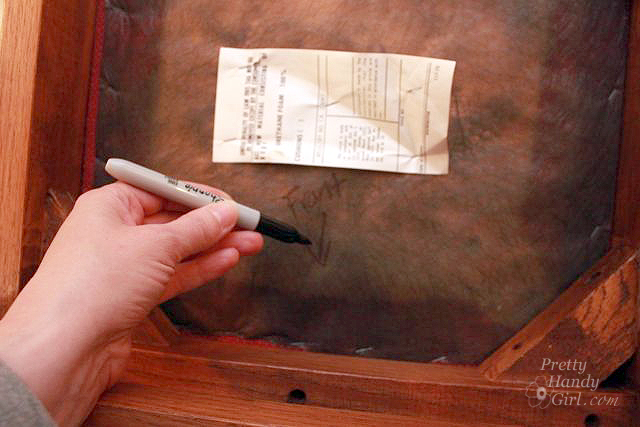
Earlier than I touched the seats, I flipped over the chairs and marked the entrance facet of the chair so they might match collectively completely after I put them again collectively.
Subsequent I eliminated all of the screws securing the chair seat to the body of the chair (all six of them.)

Due to the development of those chairs, I discovered it crucial to make use of an extended bit on my drill to get into every gap.

I pried off the piping from the seat backs with a 5-in-1 painter’s device and needle-nosed pliers. Then eliminated the outdated material and outdated foam.

After the seats have been eliminated, every chair obtained a very good cleansing, a bit of sanding after which a pair coats of Miss Mustard Seed Milk Paint (colours used: tricycle and luckett’s inexperienced) and the blue one was chalk painted.
I used the bonding agent with the milk paint to ensure the paint would persist with the chairs.

Lastly, the chairs every obtained two coats of Minwax Polycrylic as a result of these kindergartners are powerful on furnishings and this can be a nice method to give them a bit extra safety.

Now on to the enjoyable half!
The right way to Reupholster This Finish Up Model Chairs:
You’ll be able to choose up the provides at Residence Depot, Lowe’s, or your native craft retailer.
Supplies:
(I’ve included affiliate hyperlinks on your comfort. I earn a small share from a purchase order utilizing these hyperlinks. There isn’t any extra value to you. You’ll be able to learn extra about affiliate hyperlinks right here.)


I let my son’s trainer to select new material from certainly one of my favourite material sources, Spoonflower.com.
Not solely have they got a great deal of designs to select from, however you too can add your individual graphics and create your individual customized material!
It’s also possible to take a look at your native material retailer.
She picked out cute area themed patterned material: Rocketship material and House Fireworks material.
With a main colour palette, they’re the proper material selection for a kindergarten classroom.
Directions:
Reduce out material, oil-cloth (non-compulsory), and any extra batting a number of inches bigger than the underside of the chair seat.
The beauty of this challenge isn’t any stitching machine is required for this upholstery challenge.

Layer the new items of material face down on the ground. then the oil-cloth subsequent (I put the oil-cloth face up so the fuzzy again facet can be in opposition to the material to maintain it from feeling too crinkly.)
Reduce a sq. out of every nook about 1″ from the seat cushion nook.

Staple one staple into the middle of every facet. Work throughout kind one another, gently stretching the material taut.

Add extra staples alongside both sides.

Corners are neatly folded after which stapled to safe them. Hammer any staples that didn’t go fully into the underside of the seat.

Re-attach the seat to the chair body by changing all of the screws.

Flip the chair proper facet up and comply with these steps:
- Layer batting, then material over the chair again. Trim the batting to suit completely on the again of the chair.
- Reduce the material about an inch wider on the 2 sides and the underside. Fold beneath the uncooked edges of the material.
- Safe the material to the chair again by stapling on the prime of either side first.

Subsequent put a number of staples into the underside of the seat again (hidden from view.)

Proceed stapling the material to the chair alongside the perimeters.Â
Set your staples as near the body as potential so the piping will disguise your staples later.
Hammer any staples that stick up.

In the event you haven’t carried out so already, make your piping.
The simplest means to try this is to sew your piping following this tutorial. Trim the surplus material from the piping.

Peel again the ends of the piping material to show about an inch of the rope inside. Reduce the rope.
Then fold the material again and tuck the uncooked edges inside. This will provide you with a flat part on the finish of your piping.

- Staple this flat finish to the underside of the chair again.
- Unfold some sizzling glue on prime of the staples alongside the facet of the chair again.
- Pull the piping taut and press it into the new glue.
- Safe the tip of the piping with sizzling glue and a staple.

Safe the piping to the alternative facet utilizing the identical methodology. Comply with the identical tutorial for the second chair.

That’s it! Take a look at this candy new chair!

Would that it was the identical chair if I hadn’t proven you?
BEFORE:

AFTER:

Good, let’s preserve it our little secret ;-).
The subsequent time you see an outdated chair on the thrift retailer, take into account giving it a brand new look with this straightforward weblog submit tutorial.
There isn’t a want for knowledgeable upholsterer. Give it a attempt. You can be amazed at simply how straightforward it’s. Good luck!
The brand new chairs have been such an enormous hit with the youngsters. All of them rushed to be the primary to take a seat on them.
I feel their trainer was pleased with the completed product too.

It’s a cheerful trio of kindergarten chairs!


Pin this picture to avoid wasting for later or share with a good friend:

You may additionally like this chair makeover with a video tutorial on my YouTube channel:

Â
Pin for later!
